I remember the first time I made Fun And Easy Pinwheel Cookies with my daughter, Emily. It was a rainy weekend, and the cozy scent of vanilla wafted through our Asheville kitchen. The kind of day that begs for a bit of nostalgia and a sprinkle of creativity. I dug out my grandmother’s old rolling pin, slightly worn and well-loved, bringing with it a flood of cherished memories. We gathered all the colorful ingredients scattered on our counter—rich chocolate, bright sprinkles, and creamy peanut butter—all waiting to be transformed into these delightful confections.
With laughter spilling from our hearts, we rolled the dough together, and I could almost hear my grandmother’s voice guiding us through the process. There was something truly magical about watching the layers of flavors come together, and as we rolled and sliced, I felt a connection that transcended generations. The joy in Emily’s eyes as she crafted her rolls was more than just about cookies; it was about learning and sharing love. These Fun And Easy Pinwheel Cookies became a staple in our house, embodying not just a recipe but a shared adventure and a celebration of creativity.
Flavor and Popularity
The Unique Flavor Profile of Fun And Easy Pinwheel Cookies
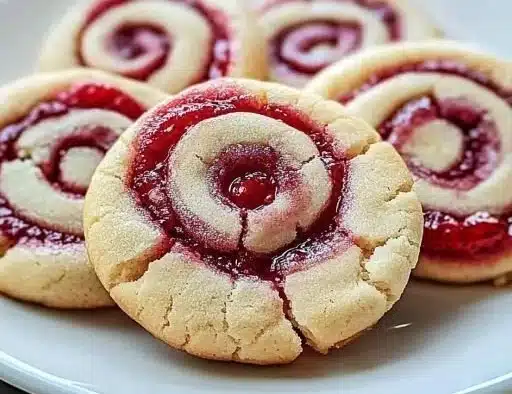
Fun And Easy Pinwheel Cookies burst with delightful flavor and color. These cookies are a wonderful melding of sweetness and a hint of earthiness depending on your chosen ingredients. Imagine buttery vanilla dough swirled with creamy peanut butter or melted chocolate—a taste that dances on your palate. Every bite offers a surprise, from the crunch of chopped nuts to the burst of colorful sprinkles, making each cookie truly unique.
The versatility of these cookies allows for customization. You can play with different flavored fillings, like rich cream cheese and fresh fruit preserves or even savory options if you’re feeling adventurous. Each combination not only brings new flavors but creates an exciting visual feast as well. The vibrant swirls of colors make Fun And Easy Pinwheel Cookies as much a treat for the eyes as for the taste buds.
Why This Recipe Is a Family Favorite and Crowd-Pleaser
These cookies aren’t just delicious; they evoke warmth and connection, making them a cherished family favorite. With their playful appearance, Fun And Easy Pinwheel Cookies ignite creativity during family gatherings, and they’re an exciting project to embark on with kids in the kitchen. Everyone loves to get involved, whether it’s rolling the dough or picking their favorite fillings. They invite personalization, turning each cookie into a canvas for expression.
Whenever I bring these cookies to potlucks or neighborhood gatherings, they always disappear first! There’s something about the nostalgic look and promise of flavor that draws people in, creating excitement and chatter around the dessert table. And let’s face it—who can resist the sight of those swirled designs, each one more delightful than the last? They don’t just taste good; they bring smiles all around.
Ingredients and Preparation
Essential Ingredients and Possible Substitutions
To whip up your Fun And Easy Pinwheel Cookies, you’ll need a few essential ingredients. Here’s what you’ll gather:
- Butter: Choose unsalted for perfect control over the sweetness of your dough.
- Granulated Sugar: Adds sweetness and texture.
- Eggs: Essential for binding the ingredients together and creating rich flavors.
- All-Purpose Flour: The backbone of your dough, providing that soft, tender texture.
- Baking Powder: Helps the cookies rise, creating a delightful fluffiness.
- Vanilla Extract: Infuses a warm, inviting aroma that harmonizes beautifully with the sweetness.
- Fillings: This is where you can get creative! Choose from peanut butter, chocolate, jam, or even savory fillings like cream cheese and herbs.
If you need substitutions, no worries! You can use margarine instead of butter or replace granulated sugar with coconut sugar for a hint of caramel flavor. If you’re looking for a gluten-free option, almond flour works wonders! Keep in mind, you may need to adjust the quantities a bit to get the right consistency.
Step-by-Step Recipe Instructions with Tips
Prepare the Dough: In a large bowl, cream together the unsalted butter and sugar until light and fluffy. This usually takes about 3-5 minutes. Add in eggs and vanilla extract, mixing until fully incorporated.
Mix Dry Ingredients: In another bowl, whisk together the flour and baking powder. Gradually add this to the wet mixture, stirring until combined. The dough should be soft and pliable.
Divide and Flavor: Once your dough is ready, divide it into two equal portions. Here’s where you can infuse fun! Add your choice of filling to one half. For chocolate, mix in cocoa powder; for peanut butter, just swirl it in.
Roll It Out: On a floured surface, roll out the plain dough into a rectangle, about 1/4 inch thick. Then place the flavored dough on top, ensuring it covers the plain dough evenly.
Roll and Chill: Start rolling from one long edge, creating a tight log. Wrap it in plastic wrap and pop it in the refrigerator for at least an hour. This step is vital; it ensures clean slices.
Slice and Bake: Preheat your oven to 350°F (175°C). Remove the log from the refrigerator and slice it into 1/4-inch thick rounds. Place them on a lined baking sheet. Bake for about 10-12 minutes until the edges are golden.
Cool and Enjoy: Allow your cookies to cool on the baking sheet for just a few minutes before transferring them to a wire rack. Feel free to sprinkle with powdered sugar or drizzle with icing once cooled!
Cooking Techniques and Tips
How to Cook Fun And Easy Pinwheel Cookies Perfectly
When baking, room temperature ingredients yield the best results. Make sure your butter is soft enough to cream easily with sugar, as this will help aerate the mixture. Also, don’t skip the chilling step! This helps maintain the shape of the cookies and prevents them from spreading too much.
Another tip is to invest in a sharp knife for slicing your log. A clean cut will give you those perfect pinwheels you desire. As a final touch, experiment with various fillings and toppings—making these cookies your own is what makes them special!
Common Mistakes to Avoid
A common mistake is overworking your dough. Mixing too much can lead to tough cookies. Also, be careful not to roll the dough too thin; you want to keep some thickness to maintain that delightful chewy texture. Lastly, oven temperature variance can affect baking time, so always keep an eye on them to prevent burning.
Health Benefits and Serving Suggestions
Nutritional Value of Fun And Easy Pinwheel Cookies
While these cookies are certainly a sweet treat, they can also offer some nutritional value depending on your ingredients. For instance, incorporating whole grains into your flour mix can increase fiber content. Using natural sweeteners helps lower the glycemic index, and incorporating nut butters can add a protein boost, making them a more balanced dessert option.
Best Ways to Serve and Pair This Dish
Fun And Easy Pinwheel Cookies are delightful on their own but can serve as a compelling addition to any dessert table. Pair them with a cup of coffee or tea for a cozy afternoon treat. They make for beautiful party favors or can add diverse flavors when served alongside other sweet treats, such as brownies or an array of fruit.
When entertaining, consider transforming these cookies into a dessert bar where guests can build their pinwheel creations! Set out various fillings and toppings, allowing everyone to customize their cookie experience. It’s a fun, interactive way to enjoy dessert!
FAQ Section
What type of mushrooms are best for Fun And Easy Pinwheel Cookies?
While mushrooms may not be a typical ingredient in sweet pinwheel cookies, if you’re wondering about savory variations, consider using shiitake or cremini mushrooms for an earthy, umami flavor profile that pairs surprisingly well with certain spices.
Can I use dried garlic instead of fresh?
Yes, you can use dried garlic in your savory iterations, but adjust the amount to taste. Generally, 1/8 teaspoon of dried garlic powder can stand in for one clove of fresh garlic.
How do I store leftover Fun And Easy Pinwheel Cookies?
Store them in an airtight container at room temperature for up to 5 days. You can keep the cookies in the refrigerator for longer freshness, but they may lose their wonderful texture.
Can I freeze Fun And Easy Pinwheel Cookies?
Absolutely! You can freeze them either before or after baking. If you opt to freeze the sliced dough, wrap it tightly in plastic wrap and then in foil. They will last for up to 3 months. To enjoy them, simply bake from frozen, adding a couple of extra minutes to your baking time.
Conclusion
If you’re like me, there’s something comforting about creating simple, joyful recipes that bring the family together. Making Fun And Easy Pinwheel Cookies is more than just a kitchen project; it’s an opportunity to bond, laugh, and create lasting memories. Trust me, you’ll want to make this again and again. Whether it’s for a weekday treat or a special occasion, these cookies promise smiles, stories, and satisfaction with every delightful bite. So gather your loved ones and let the fun begin!
Print
Fun And Easy Pinwheel Cookies
- Total Time: 75 minutes
- Yield: 36 cookies 1x
- Diet: Vegetarian
Description
Delightful and whimsical pinwheel cookies swirled with creamy peanut butter, rich chocolate, or your favorite fillings, perfect for family bonding and creative baking.
Ingredients
- 1 cup unsalted butter, softened
- 1 cup granulated sugar
- 2 eggs
- 3 cups all-purpose flour
- 1 tsp baking powder
- 2 tsp vanilla extract
- Fillings (peanut butter, chocolate, jam, savory options)
Instructions
- Cream together the unsalted butter and granulated sugar until light and fluffy (3-5 minutes).
- Add eggs and vanilla extract, mixing until incorporated.
- In another bowl, whisk together flour and baking powder, then gradually combine with the wet mixture.
- Divide the dough and add your choice of filling to one half.
- Roll out the plain dough into a rectangle, about 1/4 inch thick, and layer the flavored dough on top.
- Roll tightly from one edge to create a log, wrap in plastic wrap, and refrigerate for at least one hour.
- Preheat your oven to 350°F (175°C).
- Slice the log into 1/4-inch thick rounds and place on a lined baking sheet.
- Bake for 10-12 minutes until edges are golden.
- Cool slightly on the baking sheet before transferring to a wire rack.
Notes
Experiment with different fillings and serve with coffee or tea. These cookies can be frozen for up to 3 months.
- Prep Time: 15 minutes
- Cook Time: 12 minutes
- Category: Dessert
- Method: Baking
- Cuisine: American
Nutrition
- Serving Size: 1 cookie
- Calories: 180
- Sugar: 10g
- Sodium: 100mg
- Fat: 9g
- Saturated Fat: 5g
- Unsaturated Fat: 3g
- Trans Fat: 0g
- Carbohydrates: 24g
- Fiber: 0g
- Protein: 2g
- Cholesterol: 30mg
Keywords: cookies, dessert, baking, family recipes